Data-Driven Manufacturing Scales Down
An automatic gaging station demonstrates the potential of shopfloor connectivity at the level of the individual machine tool.
Share


Data-driven manufacturing does not have to be overwhelming or complex. Simple feedback loops from a measurement instrument to a CNC can provide a means for skills-strapped manufacturers to ensure quality parts with minimal involvement from shop personnel.
This was my thinking upon encountering an automatic gaging station that calculates and corrects turning insert wear offsets in real time. Available from Inc., the new U.S. arm of Indian machine tool builder Marshall Machines Ltd., SmartCorrect is designed to ensure defect-free, high-production turning in environments where skilled machine operators and inspectors are scarce. In a recent conversation, CTO Gaurav Sarup detailed how the system works.
Dedicated to specific parts and part families, each gaging station is configured with custom fixtures and digital measuring tools from companies like Heidenhain and Marposs. Various moving elements manipulate parts and probes alike to automate measurements that might otherwise be taken by hand. In addition to labor cost savings, both at the machine and potentially in downstream quality control, this physical automation eliminates the risk of mistakes like using the wrong measuring tool, using the right tool in the wrong way or using an uncalibrated tool.
From there, data-driven automation addresses two other common mistakes that lead to part defects. One is analysis of the inspection data. As inserts wear, measured features tend to trend larger, eventually reaching the limit of the specified tolerance. Generally, people track these measurements and periodically adjust tool-wear offsets to maintain specifications from part to part. Poorly calculated or poorly timed offset corrections can lead to scrapped parts, scrapped tools, or even a damaged machine, among other costs and delays.
SmartCorrect automates offset calculation. However, this is possible only after a person does the work for 250 to 500 parts because the system must “learn” the extent of the variation within the process. Specifically, it must analyze enough data to calculate upper and lower control limits: thresholds that indicate when the measured part feature is trending too close to the upper or lower tolerance limit. The measurement that must cross the threshold to trigger an offset correction is the process mean: the average of the three most recent measurements. When this moving average strays into the zone between control limit and tolerance limit, the system calculates a new offset and sends it to the CNC for an automatic update. Subsequent parts stay in tolerance with no need for human input or even supervision.
The third error that causes part defects—entering the wrong data into the CNC—is nonexistent due to the gaging station’s direct connection with the lathe CNC (or two lathe CNCs, if the user desires). When purchased with Marshall’s own equipment, the gaging station is hardwired to the CNC. Offset update and calculation is performed by the company’s CLAP (Closed Loop Auto-Corrected Production) technology. For other lathes, the company generally recommends integrating Autocomp software from partner Caron Engineering. Connecting via Ethernet cable, this Windows-based system offers the same functionality as CLAP except calculation of the control limits, which must be entered manually.
All measurement and correction data is saved into a file for later analysis. Measurements can also feed into Marshall’s SmartInsert system, which derives the extent of insert wear to ensure it is changed only when its useful life is over. Autocomp provides similar tool life optimization for gaging stations connected to other builders’ equipment.
Available only on the company’s own machines is SmartChek, which provides health monitoring that is focused purely on the lathe’s spindle and two-axis assemblies. This system generates a daily digital health report to determine any deviations in terms of vibration, motor load or other parameters.
Overall, this automatic gaging station shows that data-driven manufacturing is possible without extra work, information overload or extensive and expensive storage and analysis capacity. Opportunities can also be found at the level of the individual machine tool.
Related Content
Tips for Designing CNC Programs That Help Operators
The way a G-code program is formatted directly affects the productivity of the CNC people who use them. Design CNC programs that make CNC setup people and operators’ jobs easier.
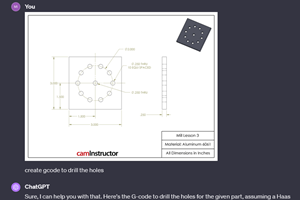
Read MoreCan ChatGPT Create Usable G-Code Programs?
Since its debut in late 2022, ChatGPT has been used in many situations, from writing stories to writing code, including G-code. But is it useful to shops? We asked a CAM expert for his thoughts.
Read More4 Commonly Misapplied CNC Features
Misapplication of these important CNC features will result in wasted time, wasted or duplicated effort and/or wasted material.
Read MoreHow to Mitigate Chatter to Boost Machining Rates
There are usually better solutions to chatter than just reducing the feed rate. Through vibration analysis, the chatter problem can be solved, enabling much higher metal removal rates, better quality and longer tool life.
Read MoreRead Next
How I Made It: Dennis Rymanowski
Dennis Rymanowski has worked at NSH USA for 60 years, with his passion for manufacturing living alongside his passion for his family’s polka band.
Read MoreA New Frontier in Surface Finish Control
What if your machine tool could measure surface roughness as it cuts? This article explores how in-process metrology is advancing from concept to reality, enabling real-time feedback, immediate detection of anomalies and new levels of control over surface quality. Discover the technologies making this possible.
Read More


